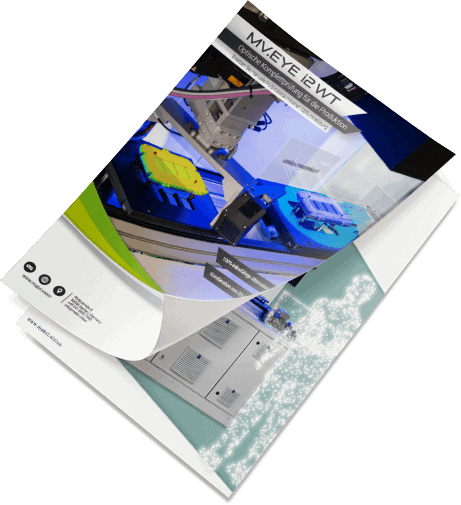
Automobile, e-mobility, energy
Automatic optical inspection of IGBT power modules
In the production of injection molded parts, errors can occur that lead to defective components. With the MV.EYE i2 product line, MABRI.VISION enables the automated optical inspection of various power modules / IGBT modules.
What do we inspect?

Pins
- Bending of pins
- Pin position (X, Y)
- Pin height (Z)
- Wobble circle
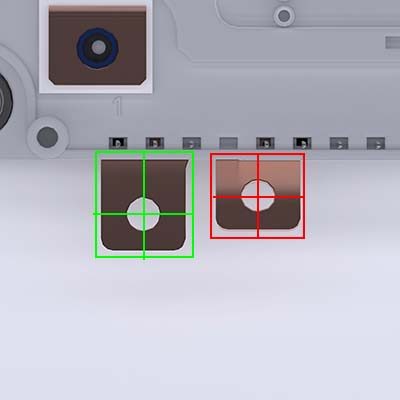
Terminals
- Bending of contacts
- Diameter
- Position (X, Y)
- Height (Z)

Alignment pins and contacts
- Defects
- Diameter
- Position (X, Y)
- Height (Z)

Base plate holes
- Defects
- Diameter
- Position (X, Y)
- Height (Z)
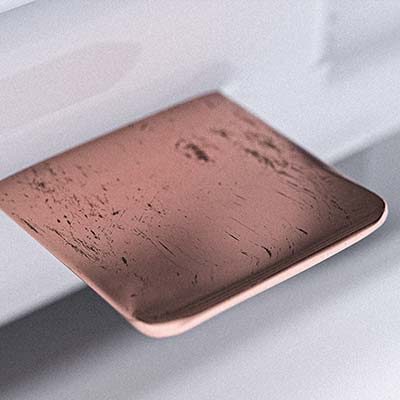
Defects and anomalies
- Scratch
- Pollution
- False images
- Discoloration

Typefaces and printing
- OCR, text recognition
- Missing font
- DMC / QR codes
Advantages and special features
- 100% testing in the production cycle
- Testing of all features on the power module with a single system
- Data storage, measurement reports and documentation images
- Interface to your ERP and production system
- Flexibly adaptable for different power modules
- Flexibly adaptable test recipes, individually expandable test features
- More cost-effective compared to complex manual testing by means of coordinate measuring machines, for example
Our solutions
MABRI.VISION has specialized in the development and implementation of complete vision solutions for use in production and research. Whether 100% inspections directly on the goods carrier system or in the clean room: by combining different high-performance optics, we meet your individual inspection requirements.
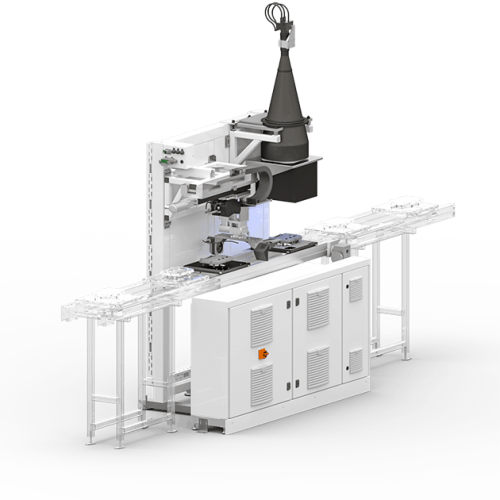
Inspection on the goods carrier system
Combination of 2D and 3D inspections for a comprehensive 100% inline component measurement on the goods carrier.

Testing on the rotary clock
Our rotary clock inspection system enables a large number of inspections in the smallest of spaces, with manual or automatic assembly.
How do we check
The inspection methods can be combined in a modular way and are based on the properties and features to be tested for your component. Depending on the requirements and component size, it is also possible to vary the size of the sensors.
Shadow casting system
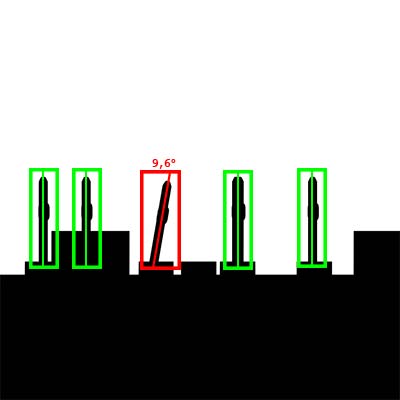
When inspecting components according to the shadowing principle, the contours of the test parts are recorded with a high degree of accuracy. Difficult features such as contact probes and pins, which are often challenging for other 3D test methods, can also be measured in this way. By adding this test unit, a high degree of flexibility is achieved in the detection of difficult test features, even with short cycle times. However, this testing technology not only impresses with its precision, but also with its high measuring rate, even for complex testing tasks. The shadow cast inspection is therefore ideally suited for testing moving products directly in the production line.

Particularities
The shadow impact inspection is characterized by the measurement of features with a high aspect ratio, such as contact pins and pins. The results are robust and precise measurements, as well as a high degree of flexibility, which is made possible by the combination with linear technology and a rotation unit.
Measurement characteristics
- Height width length
- Angular positions
- Shape measurement
- Measurement of contact pins / pins, among other things
Field of view
700 x 70 mm
System resolution
71 MP
Sampling time
from 20 ms
Particularities
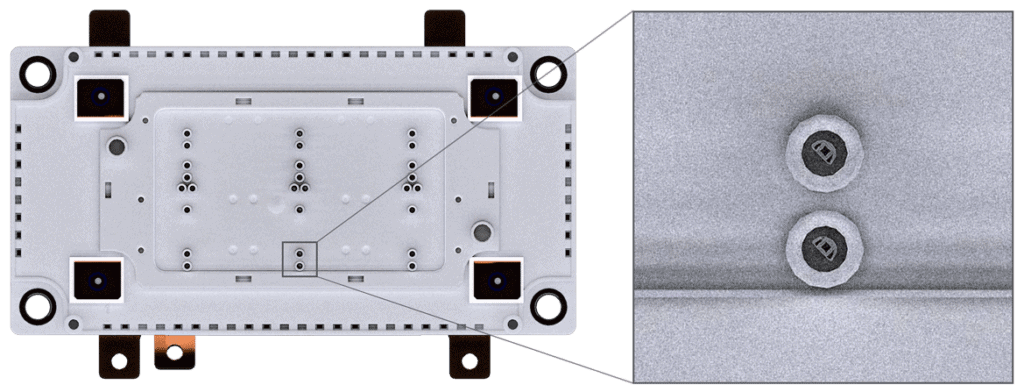
The telecentric 2D inspection impresses with its high resolution of up to 71 MP and a sampling time from 20 ms. Despite a large field of view, telecentric testing can be carried out. The inspection system is supported by coordinated lighting.
Measurement characteristics
- Longitude, latitude, position
- Defects, scratches and
- Pollution
- 2D shape inspection
- Target / actual comparisons
Field of view
280 x 280 mm
precision
71 MP
Sampling time
from 20 ms
Telecentric 2D inspection
The precise inspection of large components using 2D camera technology is challenging. This is due on the one hand to the lack of 3D information and on the other hand to the requirements placed on the camera and optics. We address these challenges by using special telecentric lenses with a large field of view. In addition, we rely on the latest camera technology and thus achieve new possibilities in terms of precision and resolution. Furthermore, we use the 3D information from the other test stations to further optimize the alignment of the measuring plane.
3D line sensor
Line sensors are an effective and inexpensive solution for checking 3D features and complete component digitization. Particularly noteworthy are the speed and precision of the surface measurement. The use of the latest light section sensors enables highly precise measurements to be made even of multilayered, reflective and transparent materials.
Thanks to their high measuring speed with up to 6 million measuring points per second, 3D line sensors are ideal for use in inline test systems. The robust sensors easily withstand the specific requirements of industrial high-efficiency environments. With fast, three-dimensional recording of large surfaces, you can rely on both non-contact and seamless testing in your production.


Particularities
With up to 6 million data points per second, the 3D line sensor is one of the most widely used sensors in industrial inline use. Robust measurements with resolutions in the single-digit micrometer range correspond to the industry standard. The 3D line sensor can be used flexibly on different surfaces.
Measurement characteristics
- Height, length and width
- Form and position
- Target / actual comparison
- Component digitization
Measuring width
2 x 240 mm
Resolution X
25 µm
Resolution Z
4 µm
Software
Use in industrial production made a number of demands on the software in inspection systems. In the MV.EYE i2 WT inspection system, MABRI.VISION provides you with a smart software solution that can be adapted to the needs of your component inspection thanks to its modular structure. Whether interfaces, visualization, user management or databases - our team of experts is at your side with individual advice and implementation.
Thanks to numerous projects in various industries, our software is tailored to industrial needs. The software platform offers you a variety of visualization options. In this way, you keep an overview of production processes and quality assurance through meaningful evaluations. The MABRI.VISION software also follows an efficient programming for complex test tasks in order to enable an evaluation in time with your production.

Intuitive user interface
We offer you a modern and modular user interface. A touch interface with full HD resolution gives us a lot of overview and space to visualize the relevant process parameters.
Made for production
We manage the balancing act between industrial software and a modern user experience by combining different platforms and technologies in our framework. In this way, we map real-time processes and the familiar Windows environment in one. This enables us to operate our test systems efficiently and with little training. Features include:
- Process indicators and visualization of relevant results
- Complete tracking through results exports and databases
- Batch management
- Calibration and evaluation options
- Integration through all industrial interfaces
- Extended user management with audit trail
Artificial intelligence
Machine learning and artificial intelligence are more than just a marketing term at MABRI.VISION. In the design phase, our experts assess whether the use of AI solutions can support the test in a meaningful way.
Modular construction
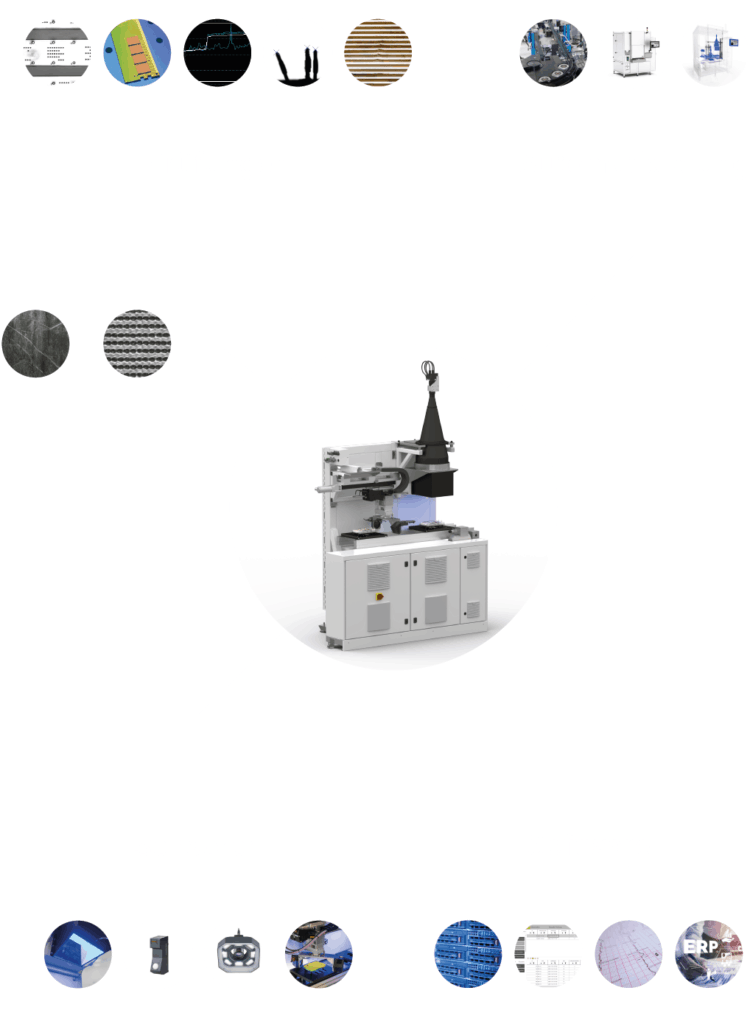
The requirements of modern production environments are diverse and challenging. None of the complex manufacturing processes are alike - which is why quality control in particular demands adaptable solutions. The MABRI.VISION inspection system MV.EYE i2 WT is designed so that it can be modularly adapted to your production conditions.
Inspections
Perform a comprehensive quality inspection of 2D and 3D features on your components. The system includes a 3D surface inspection with a particularly large line width, a large and fast telecentric 2D inspection and an additional measurement using an optical micrometer.
Automation
The MABRI.VISION test system is suitable for use on different goods carrier systems in production. Depending on the requirements of your application, the MABRI.VISION team will be happy to implement the inspection steps in a rotary indexing system.
Sensors
When designing inspection systems, MABRI.VISION relies on sensors that are designed for use under modern production conditions. Thanks to a modular structure and modern software interfaces, our experts always have their finger on the pulse. We react quickly and always provide our customers with the latest generations of sensors and state-of-the-art technologies.
Software
Our MV.IMAGING software also has a modular structure. In addition to a broad repertoire of standard modules, our experts will be happy to advise you and expand the software with suitable modules for your application. The implementation of different interfaces enables seamless integration of the test system into your production process. The use of advanced parallelization mechanisms guarantees high-performance evaluation in time.
Information material.
Why MABRI.VISION
MABRI.VISION builds and develops high-quality machine vision solutions and modular inspection systems for your production processes. Our modular system enables us to provide solutions for your inspection tasks quickly and efficiently.
Innovative solutions - our passion!
Innovative solutions - our passion!
Innovation is the foundation for continuous growth in modern industry. At MABRI.VISION we live this anew every day. The focus is always on the benefits and requirements of our customers. We are passionate about implementing inspection processes that range from AI-based computer vision solutions to 100% inline component measurement for sophisticated products. We use the latest generations of the most advanced technologies for our measurement technology. With this philosophy we want to make production processes more efficient and dynamic.
AI, processing, control - one software platform
AI, processing, control - one software platform
With the goals of Industry 4.0 and a continuous improvement process, the demands on inspection automation, interfaces and efficient evaluation algorithms are increasing. We at MABRI.VISION have recognized this trend and are going one step further. Our software team develops modular software platforms that combine all the components of modern inspection systems. If necessary, we can expand evaluation algorithms with neural networks, map fast interfaces to system controls and integrate audit trails, batch reports, progress graphs or databases as required.
A strong team, always there for you.
A strong team, always there for you.
As our customer, you are always at the forefront. Our team of experts in vision, construction, software development, electrics, assembly and support is always there for you. With modern company processes and IT solutions, speed is a key goal. With our service solutions through to 24/7 support, we support your production with efficient solutions.
End-to-end solutions, everything from a single source.
End-to-end solutions, everything from a single source.
You think in terms of processes, we think in terms of solutions: that's why we offer our customers turnkey inspection systems that can be seamlessly integrated into your production processes. Our experts advise on planning and design at the beginning of a project. If technologies need to be evaluated, we carry out feasibility studies and inline tests. At MABRI.VISION we offer system construction, programming and automation from a single source. We can optimize complex evaluations and inspections directly with the system control and all customer interfaces.

